A practical place to begin
Peas tend to be planned as a packet of seeds and remembered later as a tangle of stems. In a small garden, support, access, and harvest type deserve attention first. A short row of snap or snow peas can be more useful than a large sowing of shelling peas if you want frequent small pickings.
Choose edible garden peas for the harvest you prefer: pods, shelled peas, or young shoots. Ornamental sweet peas are a different plant and must not be eaten.
Choose the position and prepare
Find a bright position in the appropriate cool growing season, with room to reach both sides if possible. Keep taller supports where they will not shade every nearby crop or obstruct a path.
Install a stable trellis, mesh, or twig support before roots fill the growing area. A container needs sufficient depth and volume to buffer moisture. Tall varieties require a structure that remains safe in wind.
Direct sow or use young plants according to local guidance and packet instructions. Protect newly sown seed where birds or rodents are a problem. Avoid leaving young plants in small modules until their roots form a dense knot.
A manageable care routine
Maintain even moisture, particularly when flowers and pods develop. A shallow surface splash is not enough for a large container. Check drainage after prolonged rain and do not leave roots standing in a full tray.
Peas form associations with nitrogen-fixing bacteria, but still need suitable growing conditions and balanced nutrition. Avoid routine high-nitrogen feeding. Follow local advice if growing in a medium with little fertility.
Guide young tendrils toward the support and inspect for gaps where stems sag. Harvest pods at the correct stage for the type grown. Regular picking makes crop quality easier to maintain.
Observe before changing the plan
Powdery coatings on leaves and poor late-season vigour may signal that the crop is nearing its end or conditions are unsuitable. Identify pests before treating. Do not confuse normal tendrils with a symptom that needs cutting away.
Grow a manageable row of a short variety and record how easily pods can be reached. If half the harvest hides against a wall, change support placement next time rather than simply increasing plant numbers.
Adapt and renew
Use a local sowing window for cool-season peas. Hot weather can reduce performance, while cold wet soil may delay or spoil establishment. Calendar dates from another climate are poor substitutes for local conditions.
Pick promptly, wash edible pods or peas before use, and remove exhausted plants when the crop ends. Cut stems near soil level if leaving roots in place is practical. Clear diseased material according to local guidance.
Choose the harvest before the variety
Shelling peas provide the seeds inside the pod, while snap and snow peas are selected for edible pods harvested at different stages. That distinction changes how much useful food a short row provides and how often it needs picking. Read the packet and buy a named edible variety suited to your intended use. Ornamental sweet peas are not interchangeable with edible garden peas and must not be eaten.
Consider the mature height as well as the harvest type. A short variety can suit a container without becoming a tall wall of foliage, although it may still benefit from light support. A tall variety can make good use of vertical space only when the structure and root volume are adequate. Do not choose it merely because the seed packet is available.
For a first attempt, grow a manageable number and keep the label. Record what the kitchen actually uses. A household that enjoys picking a few tender pods may value a compact snap-pea crop more than a larger shelling crop with a brief concentrated harvest. The best variety is the one that fits both the growing position and the way you eat.
Install support while the pot is empty
A trellis is easiest to place before sowing or while plants are very small. Later insertion can damage roots and require untangling stems. Choose mesh, twigs, or another support that the tendrils can grip, and make sure the whole arrangement remains stable when wet foliage catches wind. A tall support in a narrow lightweight pot needs particular caution.
Leave access to harvest. A support pressed tightly against a wall can hide pods and make inspection awkward. If only one side is reachable, arrange the planting with that limitation in mind. Do not let the trellis block the container’s watering point or make it impossible to check drainage.
Young tendrils may need gentle guidance toward the support, but avoid tying soft stems tightly. Check after gusty weather for stems that have fallen away. The goal is a loose supported framework with enough airflow, not a rigid bundle. If a small crop repeatedly collapses, change the structure next time rather than relying on a growing collection of emergency ties. Good support makes harvesting easier and reduces accidental damage throughout the crop.
Sow into a suitable cool-season window
Peas often perform best when their growth aligns with a suitable cool period. That does not mean cold saturated soil is ideal for seed. Use local sowing guidance and observe the actual conditions in the pot or bed. A container on exposed paving can behave differently from a sheltered garden border even in the same neighbourhood.
Sow at the packet depth and protect seed where birds or rodents are likely to disturb it. If raising young plants in modules, move them before roots become badly congested and handle them carefully. Keep the root ball intact where possible. A late transplant from a tiny cell may lose the apparent head start gained indoors.
Do not make the first sowing so large that one weather event determines the whole season. A modest second batch can spread risk if the local growing window permits. Label both dates and compare establishment. The lesson is not that one date is permanently correct, but that temperature, moisture, and seedling condition work together. Keep those observations with the variety name so the next attempt begins with useful evidence.
Support the crop through flowering
As the canopy fills and flowers appear, water use can increase. Check the root zone regularly and water thoroughly when needed. Avoid letting a small pot repeatedly dry to the point of collapse. Equally, inspect drainage after prolonged rain. The plant needs air around roots as well as water, and a full tray can turn a well-drained mix into a saturated one.
Peas can associate with nitrogen-fixing bacteria, but that fact does not remove every nutritional need or guarantee that any poor medium will work. Start with suitable growing conditions and use balanced local guidance. Avoid routine heavy nitrogen feeding to force leafy growth. If the crop looks weak, examine light, moisture, root space, and weather before adding stronger feed.
Watch flowers and young pods without demanding identical performance from every stem. Heat and other stress can reduce a late crop. If the season has moved beyond the variety’s useful window, plan a different next crop rather than trying to keep peas productive indefinitely. The support may be reusable, but the plants themselves have a seasonal life that is easier to work with than to resist.
Harvest the pod at its intended stage
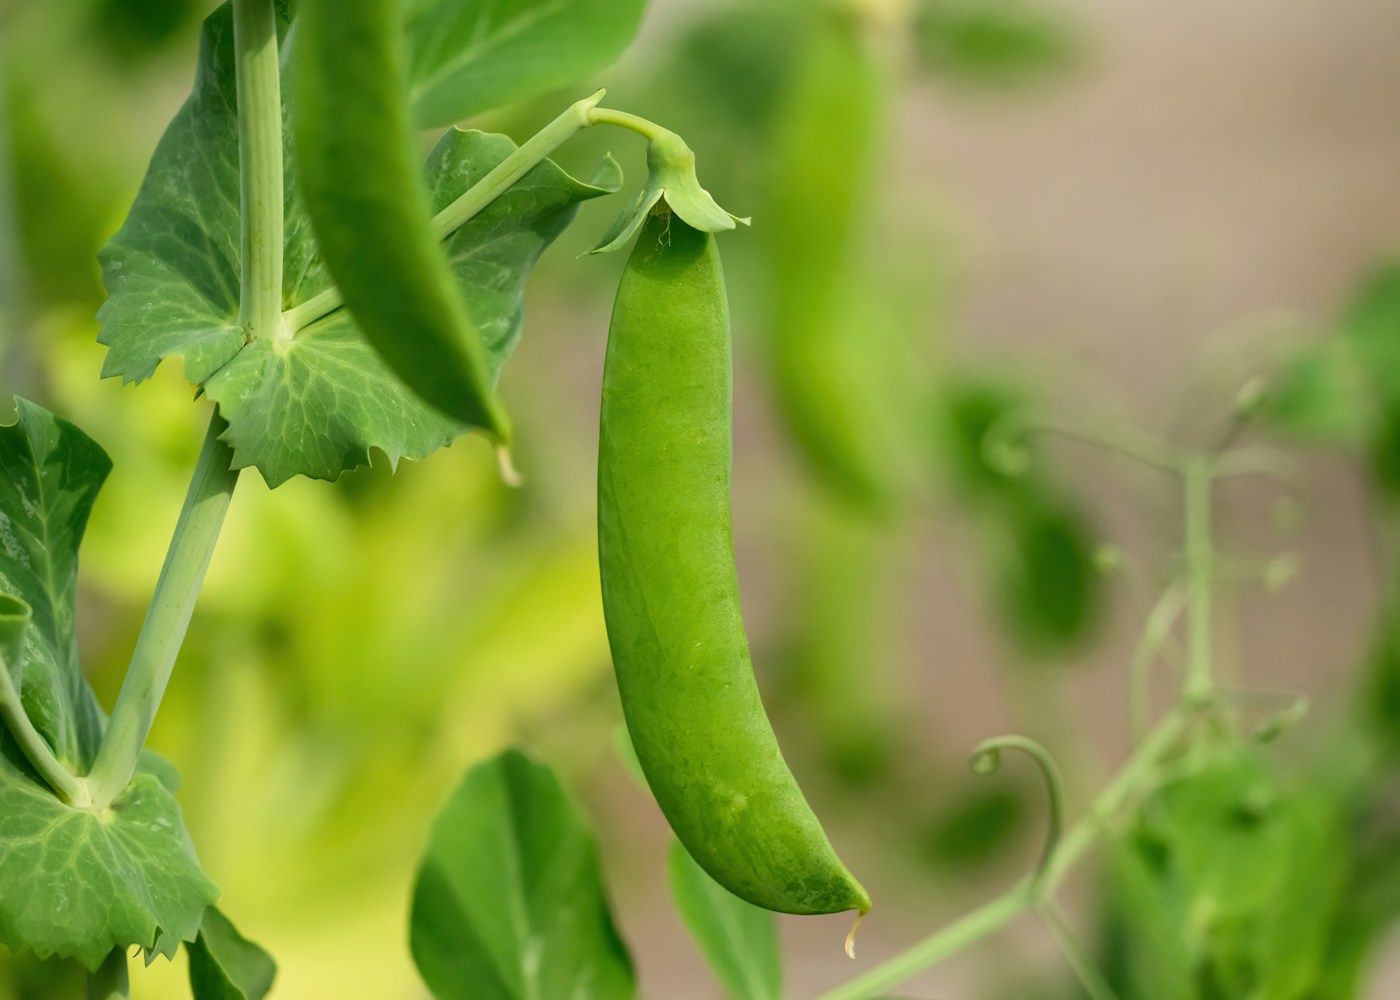
Snow peas are picked while pods are young and flat, snap peas when pods develop their characteristic fullness, and shelling peas when the seeds reach the desired eating stage. Use the variety description as a guide and sample carefully. Waiting for every pod to become as large as possible can sacrifice tenderness.
Support the stem with one hand while picking with the other. Search gently beneath foliage so the harvest does not become a series of snapped shoots. Regular picking also makes it easier to notice pests, mildew, or a declining stand. Keep edible pods and peas clean and wash them before preparation. Use correctly identified crop plants only.
When production ends, remove exhausted stems and deal appropriately with diseased material. Leaving healthy roots in place may be practical in a bed, while a container may need clearing for the next crop. Review support placement and access before reusing it. If many pods were missed because they faced the wall, change the layout rather than simply planting more. A small well-reached crop can provide a more satisfying harvest than a larger tangle whose best pods are discovered too late.
Make picking access part of the result
A pea crop can look healthy and still be inconvenient. Suppose most pods develop between a trellis and a wall, where they are difficult to see. By the time they are discovered, many have passed the preferred eating stage. The next improvement is not necessarily more plants or more feed. Move the support to allow access, choose a shorter variety, or arrange the row so its productive side faces the gardener.
During the current crop, inspect gently and pick at the intended stage without wrenching stems. Keep the path clear enough to return regularly. A support that requires leaning over other containers can turn a quick harvest into an awkward task, increasing the chance that pods are missed. Make a note of the problem while the foliage is present; an empty winter trellis can look deceptively accessible.
After the crop finishes, revise the layout before sowing again. Check mature height, container stability, and where the sun will be during the next growing window. Keep the edible variety label and distinguish it clearly from any ornamental sweet peas elsewhere in the garden. A small crop that is easy to reach, identify, and harvest can be more useful than a large one whose best pods stay hidden. Practical access is therefore part of crop planning from the moment the support is chosen.
Further reading
Horticultural references for continued learning: