Start by looking inside the decorative pot
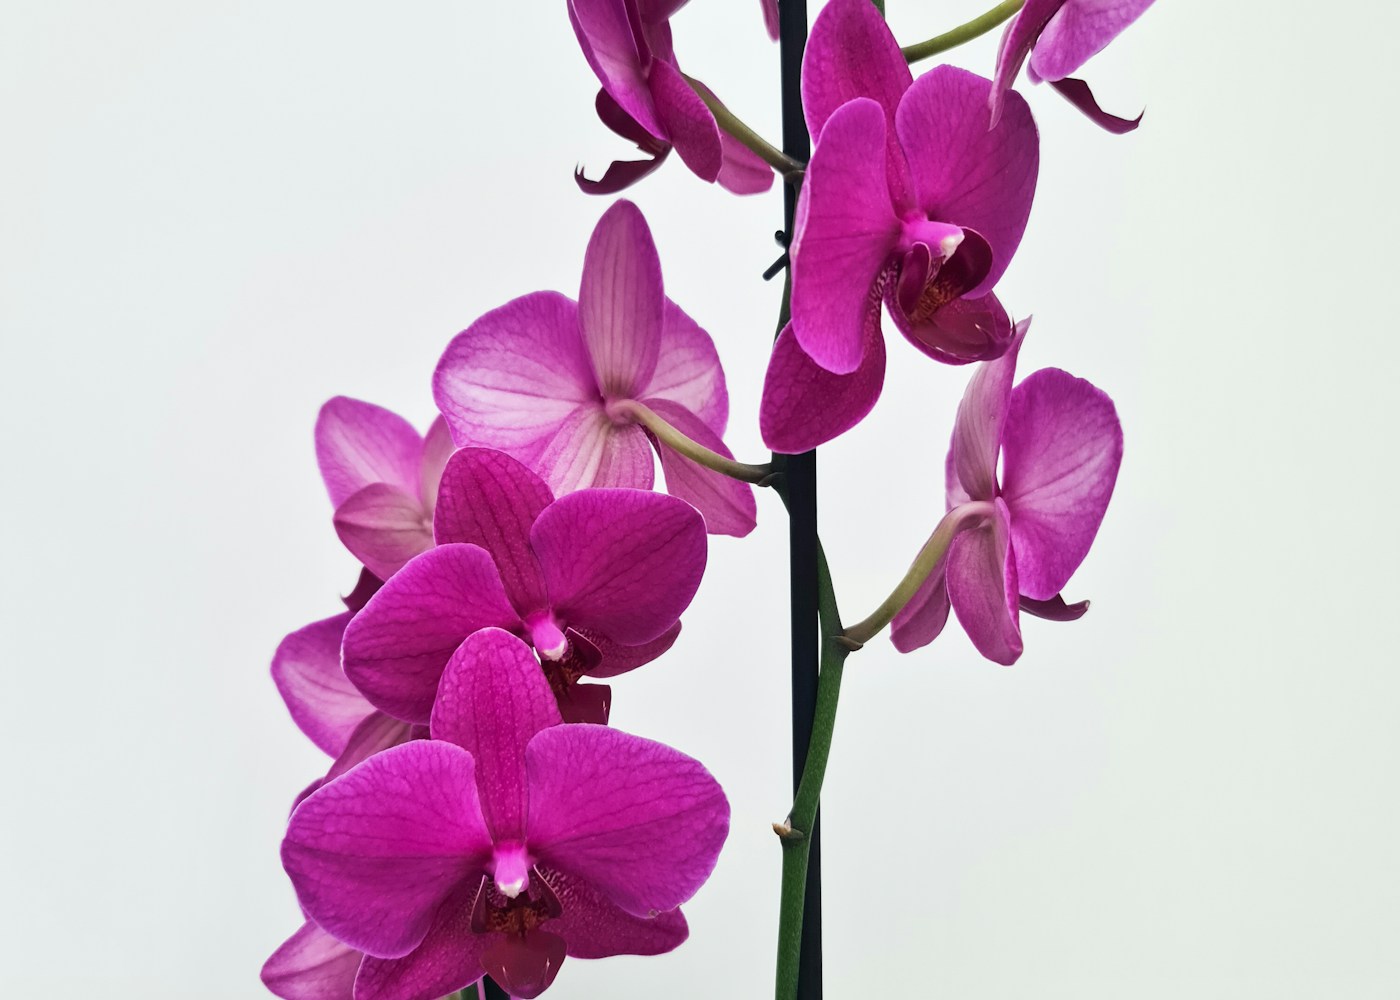
A moth orchid, usually a Phalaenopsis hybrid, arrives with flowers that seem almost unrelated to its thick leaves and exposed roots. Those roots explain how to care for it. Many moth orchids naturally grow attached to trees, where roots receive air and intermittent moisture rather than remaining buried in ordinary garden soil. A nursery-grown plant in bark or sphagnum moss still needs that balance. Its decorative outer pot should conceal the container, not conceal a reservoir of stagnant water.
Lift the inner pot out before establishing a watering routine. Check whether it contains coarse bark, tightly packed moss, or a mixture, because these materials retain moisture differently. Look for a small compressed nursery plug near the base as well; the surrounding bark may dry while that center stays wet. A clear inner pot is useful because it lets you see roots and condensation, although it does not remove the need to check the center of the medium.
Choose healthy roots over perfect flowers
Flowers are temporary, but sound roots and leaves support the next growing cycle. Firm roots may appear green when moist and silvery when dry; their exact appearance varies with lighting and root exposure. Brown color alone does not prove a root is dead if it remains firm. Soft, hollow, or collapsing roots are more concerning. Do not remove every root that looks untidy or extends over the rim. Aerial roots are normal for these plants.
Leaves should feel reasonably firm and attach securely to the crown. A single older bottom leaf can yellow as it ages, while a soft blackened center is a more serious problem. Inspect leaf joints and flower stalks for mealybugs or scale before bringing the plant into a crowded collection. Keep a new orchid separate long enough to observe it. A bargain flowering plant with severely damaged roots may require more recovery work than a smaller healthy specimen.
Give the leaves light without cooking them
Bright indirect daylight is a useful starting point for a moth orchid. A window with gentle morning light may work well, while intense afternoon sun often needs filtering. Judge the actual exposure rather than the compass direction alone; buildings, trees, screens, and season all affect the light. Leaves pressed against glass can overheat or become cold even when the room itself feels comfortable. Leave some space between the plant and the pane.
A dark shelf may preserve an existing flower display for a while without providing enough light for future flowering. Move the plant into an appropriate growing position after purchase rather than treating the flowers as proof that every room suits it. Introduce stronger light gradually. Large bleached or dry patches on the exposed leaf surface can indicate scorch. Fertilizer will not repair that tissue, so adjust exposure and assess the next healthy leaf.
Decide when the medium has nearly dried
Do not water solely because a week has passed. Coarse bark in a ventilated pot can dry much faster than packed moss in a close-fitting cover. Lift the inner pot, check visible roots, and inspect moisture deeper in the medium. Condensation can provide a clue but is not a precise gauge. A pot may show a few dry outer roots while the center remains damp. Wait until the root zone approaches dryness before rewetting it thoroughly.
For bark-grown plants, run water through the pot evenly or use a brief soak in a clean vessel, then drain completely. Avoid sharing soak water among several plants, which can transfer pests and pathogens. Moss-grown orchids need particular care because a tightly packed center can retain water for a long time. Wet the medium rather than pouring into the crown. If water collects between leaves, blot it out gently rather than leaving it trapped overnight.
Skip shortcuts that obscure the root system
Ice-cube instructions are convenient on a retail label but can hide the important question: has the entire root zone received appropriate moisture? A measured quantity of ice may not wet bark evenly, and its cold contact is unnecessary for a tropical plant. Room-temperature water and a clear view of the drainage give you more control. The useful routine is to examine the medium, hydrate it properly when needed, and let air return.
Similarly, routine misting of aerial roots does not replace watering the roots inside the pot. It can leave mineral spots or trapped crown water while the main root ball remains dry. Moderate room humidity is helpful, and a carefully maintained humidifier can improve a very dry setting. Avoid making the orchid's immediate surroundings continually wet. Air movement should be gentle rather than a cold blast from an open window or air-conditioning outlet.
Understand what happens after flowering
Individual blooms eventually fade, and an orchid finishing its flowering cycle is not necessarily declining. Remove fallen flowers before they decay around the crown. A green flower spike may branch and flower again, while a brown dry spike can be removed near its base with clean scissors. Leaving or shortening a green spike is a choice about the plant's condition and your preferred display; neither guarantees immediate flowers.
A small or stressed orchid with weak roots may benefit from putting resources into recovery rather than maintaining an old spike. Do not confuse a new root with a new flower spike and damage it while trying to train it. Roots often have rounded green tips, while spikes tend to have a different flattened tip shape, but observe for a while before intervening. Tie developing spikes loosely to a stake only while they are flexible.
Support the next bloom through ordinary growth
A healthy leaf and root system must develop between flowering cycles. Keep the orchid in good light, water according to the medium, and use an orchid-suitable fertilizer at the labeled dilution during active growth. Strong or frequent feeding cannot substitute for light. Fertilizer salts can damage sensitive roots, so allow plain-water irrigation with escaping runoff as appropriate to your medium and water quality. Do not let fertilized water accumulate in the cover pot.
Some moth orchid hybrids respond to a modest difference between day and night temperatures when initiating spikes, but deliberately chilling the plant is a poor strategy. Avoid cold windows, frost, and sudden drafts. A comfortable bright room with slightly cooler nights may already provide an appropriate change. Cultivar, maturity, and growing conditions affect timing. An orchid that produces healthy roots and leaves while taking months to flower again is not automatically being cared for incorrectly.
Repot when the medium breaks down
Bark gradually decomposes into smaller particles that hold more water and reduce air around roots. Repot when that structure deteriorates, roots become crowded, or a root problem demands attention. After flowering is often a convenient time, especially when new root growth is starting. Do not delay urgent treatment of rot merely to preserve a flower display. Conversely, a healthy newly purchased orchid need not be dismantled immediately just because it is in a clear plastic pot.
Use fresh orchid medium matched to your growing conditions and a pot with adequate drainage and ventilation. Ordinary dense houseplant compost is generally unsuitable for a typical bark-grown moth orchid. Remove old loose material gently, soak rigid roots briefly if that makes handling easier, and cut away only clearly dead or decayed roots with clean tools. Fit the roots without forcing every aerial root underground. Keep the crown above the medium and avoid a much larger pot than necessary.
Distinguish wrinkled leaves from thirst alone
Wrinkled leaves can result from a dry root zone, but they can also follow root loss in a wet one. Examine the roots before responding with repeated soaks. A dehydrated plant with healthy roots needs consistent rehydration and suitable conditions; one with rotten roots needs removal of dead tissue and a more aerated setup. Old leaves may remain wrinkled after improvement. New firm growth and healthy root tips are more useful recovery signs than the cosmetic appearance of an old leaf.
Keep scissors and pots clean, remove decaying material, and avoid crowding several orchids so tightly that leaves trap water against one another. Watch for sticky patches, white cottony insects, or hard scale bumps along flower stalks. Isolate a suspect plant and select treatments labeled for orchids and the pest involved. Fragrant oils and homemade chemical mixtures can mark flowers and leaves. A precise diagnosis is preferable to repeated spraying of every surface.
A simple first-month arrangement
Set the orchid near a bright filtered window with its clear pot inside a removable cover. Check moisture twice a week at first without automatically watering. Each time, lift the pot and look at both outer roots and the center of the medium. When nearly dry, hydrate thoroughly, drain, and return it to its place. Remove faded flowers and inspect leaf joints while handling it. This modest routine teaches you far more about the plant than trying to memorize a universal number of watering days.
Keep the label if the orchid has one. Moth orchids are only one group within a very diverse family, and instructions for their warm indoor growth should not be transferred automatically to every orchid offered for sale. Identifying the plant also helps you distinguish normal seasonal behavior from a genuine problem with light, roots, or temperature.
When carrying a flowering orchid home, protect it from cold outdoor air and abrupt temperature changes. Flowers and buds can drop after transport stress even when roots remain sound. Remove decorative wrapping once indoors so drainage and airflow are visible. Keep the plant away from ripening fruit and strong fumes where practical, and avoid placing it directly in a heater stream. Bud loss deserves a check of the environment, but it does not automatically mean the plant is dying or that every root should be cut and repotted immediately.
Further reading
Horticultural references for continued learning: